

For permanent, load-bearing garden or retaining walls, mortared stone masonry is the most durable DIY-compatible option. Done right, it outlasts dry-stacked alternatives and stands up to real earth pressure. But it demands a proper footing, working drainage, and patient curing. If your wall stays under about a meter, or you’re short on time, tools, or good stone, a dry-stone build or another approach may serve you better.
TL;DR:
- Mortared stone walls are ideal for retaining and structural purposes over about 1 meter high, especially when long-lasting strength is required.
- Proper footing, drainage, and stone fitting are critical to prevent cracking and bulging over time, with drainage being the most common failure point.
- Type S mortar mixed in ratios like 1:4 or 1:3, along with regionally appropriate stone, influences durability, installation complexity, and wall appearance.
- DIY builders should prioritize dry-fit stone, minimal mortar use, and meticulous attention to drainage; taller or more complex walls typically need professional help.
- Budget factors include stone type, excavation complexity, and labor, with larger, taller walls often best built by professionals to ensure safety and longevity.
Table of Contents
- What Is a Mortared Stone Wall, and When Does It Make Sense?
- Choosing the Right Stone and Mortar Mix
- How Deep Should the Footing and Drainage Go?
- Fitting Stones Without Drowning Them in Mortar
- Building the Wall Step by Step
- Where DIY Mortared Walls Go Wrong
- Keeping a Mortared Wall Looking and Performing Its Best
- Do You Need a Permit for This Wall?
- Rokworx’s Take on Building Mortared Stone Walls That Last
- Historical Styles and Regional Variations Worth Knowing
- Environmental Considerations for Stone Wall Construction
- What Should You Budget for a Mortared Stone Wall?
- My Take: Should You Build It Yourself or Call a Pro?
- Skip the Trial and Error: Rokworx Handles the Hard Parts
- Sources
What Is a Mortared Stone Wall, and When Does It Make Sense?
A mortared stone wall bonds individual stones with a cement-based mortar, turning a pile of irregular rock into one fused, monolithic structure. That’s the core difference from a dry-stone wall, which relies purely on gravity, friction, and careful stone selection to hold together. Mortar adds tensile strength and resistance to lateral earth pressure, which is why it’s the better call for anything doing structural work.
Good candidates for mortared construction include:
- Retaining walls holding back sloped or heavy soil
- Boundary and privacy walls above roughly 1 meter
- Raised garden beds that need to look tidy and stay put for decades
- Any wall where a neighbor’s fence, driveway, or foundation sits close behind it
If your project is shorter, purely decorative, and built from well-fitting flat stone, a dry-stone retaining wall is worth considering instead. It drains itself and skips the concrete entirely.
Choosing the Right Stone and Mortar Mix
Stone selection drives both the look and the workload. Granite is dense and nearly impossible to damage, but it’s heavy and hard to cut with hand tools. Sandstone cuts and shapes easily, which speeds up fitting, though its porosity means it needs pre-wetting before mortaring and, in some climates, a breathable sealer later. Limestone sits in between: workable, attractive, but softer and more vulnerable to acidic runoff over time. River rock looks great in a rustic wall but its rounded shape makes tight, low-mortar joints tough to achieve.
Mortar choice matters just as much as stone choice. Type S mortar is the standard recommendation for load-bearing garden and retaining walls, valued for its higher compressive and bond strength; Type N works for lighter, non-structural facing; Type M is reserved for walls carrying serious loads or below-grade exposure.
Common mix ratios:
- 1:4 (cement to sand) for general above-grade work
- 1:3 in wetter climates or where the wall faces heavy runoff
- Add hydrated lime for workability; several Australian DIY forums favor lime-enriched mixes for garden rock walls specifically
Pro Tip: *Estimate mortar volume by test-laying a one-meter stretch of your actual stone dry, then measuring the average joint gap. Multiply that gap area across the full wall face rather than guessing from a bag chart. Every stone pile fits differently.
How Deep Should the Footing and Drainage Go?
Skipping the footing is the single fastest way to watch a mortared wall crack within two winters. The sequence matters, and so does the timing.
- Excavate the trench to firm, undisturbed soil, typically about twice the wall’s width and a sufficient depth for walls under a meter, deeper for taller structures.
- Compact a layer of crushed gravel using a plate compactor, checking for a level base before anything else goes in.
- Pour a concrete footing of appropriate thickness, including light rebar reinforcement for walls over a meter or those holding back sloped ground.
- Allow the footing to cure for at least a couple of days before laying any stones, as rushing this step risks cracking under load.
- Set a perforated drainage pipe along the base behind the wall, wrap it in filter fabric, and backfill with clean, angular gravel, not soil, to keep hydrostatic pressure from building behind the face.
- Route the pipe outlet to daylight or a drain well downhill, never just capped at the end.
The drainage layer is what separates a wall that lasts decades from one that bows within a few wet seasons, and it’s the step most DIY guides shortchange.
Fitting Stones Without Drowning Them in Mortar
The best mortared walls actually use less mortar than beginners expect, because the stones do most of the structural work through direct contact. Mortar fills gaps and bonds the surface; it shouldn’t be the thing holding the wall up.
- Dry-fit every stone before mixing a drop of mortar. Rotate and test each piece until it sits with minimal gap against its neighbors.
- Use small pinch stones as wedges wherever a gap would otherwise need filling with mortar alone. Practitioners are consistent on this point: large mortar-only fills shrink and crack as they cure.
- Place tie stones, sometimes called through stones, every 60 to 80 centimeters, spanning the full depth of the wall to lock the front and back faces together.
- Reserve your flattest, widest stones for the base course and the cap course. Everything irregular belongs in the body, hidden by hearting.
Pro Tip: Keep a “reject pile” next to your stone stack. Stones that don’t seat well after two tries go there, not into a gap you’re tempted to mortar-fill instead.
Building the Wall Step by Step
Once the footing has cured, the actual laying process follows a predictable rhythm.
- Mark the wall’s face line with stakes and a mason’s line, checking it against a level before touching any stone.
- Set the first course dry along the cured footing, adjusting for the tightest possible fit and confirming level and plumb across the full run.
- Bed each first-course stone in mortar, working in short 1-meter sections so the mix doesn’t skin over before you set the next stone.
- Stagger vertical joints between courses the way a bricklayer would; a joint sitting directly above another is a structural weak point.
- Core-fill the interior with rubble and mortar as you go, and set tie stones at their planned intervals every couple of courses.
- Pre-wet porous stones like sandstone before bedding them. Dry stone pulls moisture straight out of fresh mortar and weakens the cure.
- Set the cap course with your flattest, heaviest stones, sloped slightly to shed water off the face rather than into the joints below.
- Tool the joints once the mortar starts to firm up, then brush and clean the stone faces before haze sets permanently.
- Mist the wall lightly for the first three to five days, especially in hot or dry weather, to slow the cure and prevent surface cracking.
Most of the same core sequence applies whether you’re building with river rock, fieldstone, or sandstone. The details change; the order rarely does.
Where DIY Mortared Walls Go Wrong
The most common failure isn’t bad stone. It’s mortar asked to do a job stone should be doing.
- Overfilling large gaps with mortar instead of pinch stones, which shrinks and cracks within a season or two.
- Skipping drainage entirely, which lets hydrostatic pressure build behind the wall until it bulges or tips forward.
- Bulging, staining, or efflorescence (white mineral streaks) usually points to trapped water, not a mortar problem.
- Small cracks can often be repointed by cutting out the old mortar and repacking fresh mix; a leaning or bulging section usually means calling a mason, since that’s a sign the structure itself has shifted.
Keeping a Mortared Wall Looking and Performing Its Best
A mortared wall is close to maintenance-free for years, but a short annual check saves you from bigger repairs later.
- Walk the wall each spring and fall, checking for cracked joints, loose caps, or new staining.
- Choose a breathable silane-siloxane sealer if you seal at all, since it repels water while still letting vapor escape from the stone.
- Skip sealing entirely on walls with no drainage issues; unnecessary sealing can trap moisture rather than shed it.
- For cleaning mortar haze or built-up grime, gentle pressure washing at the right distance and pressure works well; guidance from masonry cleaning specialists is worth reading before you rent equipment.
- Repoint small cracked joints as soon as you spot them rather than waiting for a full section to fail.
Do You Need a Permit for This Wall?
Most councils require consent once a retaining wall exceeds a certain height, often around 1 meter, or sits near a boundary. Check with your local council before digging. Always request an underground services check first; hitting a gas or power line is a real risk. For walls holding back significant slope, carrying surcharge loads like a driveway above, or sitting where a failure could hurt someone, bring in a structural engineer before you pour a footing.
Rokworx’s Take on Building Mortared Stone Walls That Last
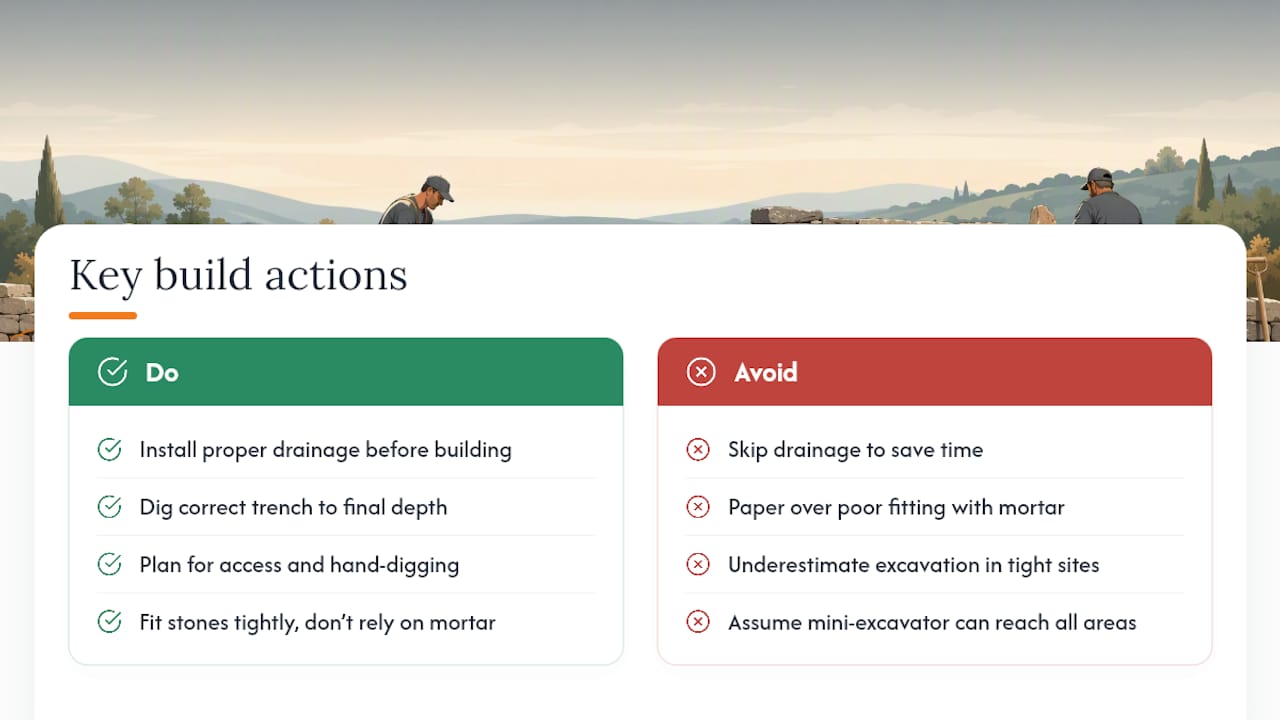
Rokworx builds and repairs retaining and rock walls across a range of site conditions, and the pattern that shows up most often on failed DIY walls is the same one covered here: drainage skipped to save a weekend, or mortar used to paper over poor stone fitting. Tight-access sites, in particular, change the excavation math significantly, since a mini excavator that can’t reach the back of a slope forces hand-digging that most homeowners underestimate. For excavation-heavy sites, getting the trench and drainage right the first time avoids the total teardown that comes with fixing it later.
Historical Styles and Regional Variations Worth Knowing
Mortared stone construction isn’t a modern invention layered onto an old technique. Roman engineers used lime-based mortar with rubble cores nearly two thousand years ago, building walls that still stand today because the mortar’s slow-curing chemistry let it flex slightly rather than crack under settling. That’s worth remembering when a modern Portland-cement mix feels stiffer than the old stonework you might be trying to imitate.
Regional styles vary mostly by what stone was locally available, not by preference. New England fieldstone walls, originally dry-stacked from cleared farmland, later got mortared versions once cement became affordable, producing the tight, irregular-fit look still popular in cool, wet climates. British Cotswold stone walls lean on flat, tabular limestone that lends itself to thin, precise coursing with minimal mortar showing. Mediterranean walls often use rubble limestone with wide, visible mortar joints, partly aesthetic and partly because the local stone rarely comes in consistent shapes.
Australian mortared walls tend to favor sandstone and granite, both widely quarried domestically, and often show wider joints than European styles because irregular quarried stone is more common than tabular fieldstone. None of these regional habits are rules. They’re solutions to whatever stone and climate a region had on hand, which is a useful reminder that the “right” joint width or stone size for your wall depends on your material, not a fixed aesthetic standard.
Environmental Considerations for Stone Wall Construction
Stone is about as low-impact a building material as landscaping gets, once you account for how it’s sourced and transported. It doesn’t off-gas, doesn’t degrade into microplastics, and a wall built well will likely outlive the house behind it, which spreads its embodied carbon over a very long service life compared to timber sleepers that need replacing every couple of decades.
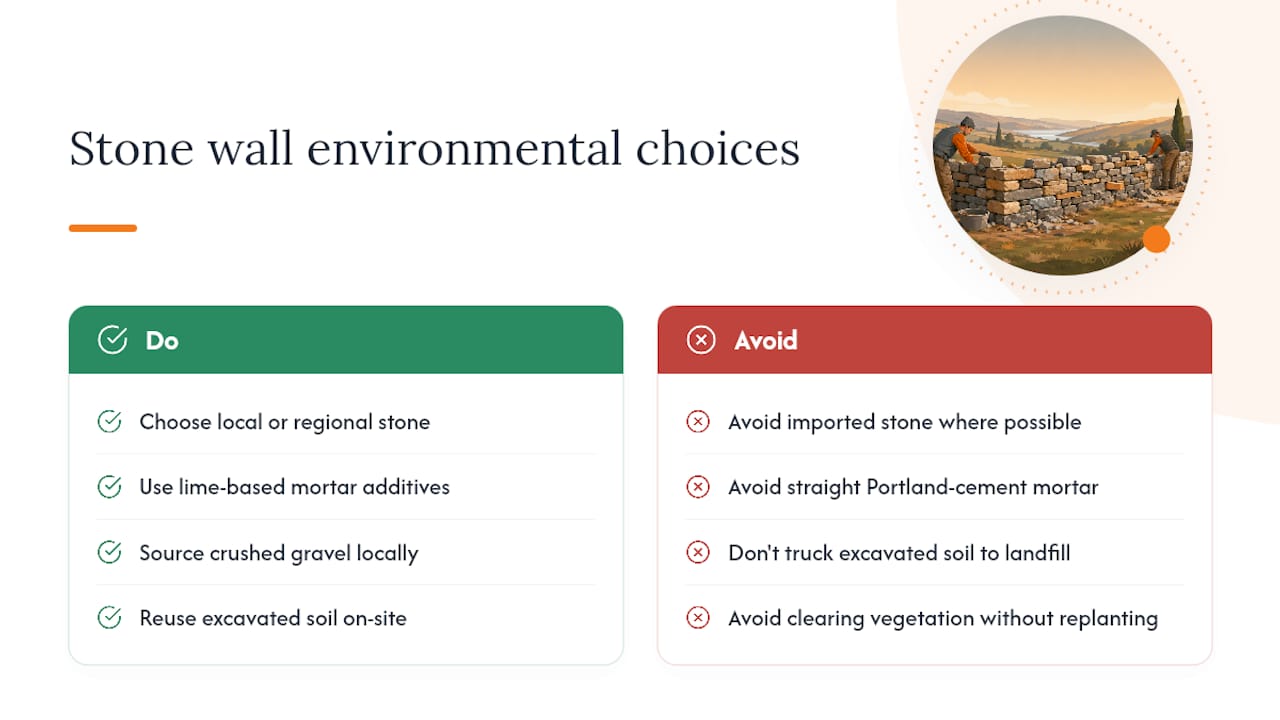
Cement is the less sustainable part of the equation. Portland cement production carries a real carbon cost, and it’s the mortar, not the stone, doing most of the environmental heavy lifting on a mortared wall. A few practical choices reduce that footprint without changing how the wall performs. Using local or regionally quarried stone cuts transport emissions substantially compared to imported material. Lime-based mortar additives, already recommended for workability in several Australian DIY discussions, also tend to have a lower carbon footprint than straight Portland-cement mixes, since lime mortar requires less energy to produce.
Drainage gravel and backfill matter here too. Sourcing crushed gravel locally rather than trucking it long distances trims the job’s transport emissions, and reusing excavated soil elsewhere on the property (rather than trucking it to landfill and buying new fill) cuts both cost and waste. If you’re clearing vegetation to make room for the wall, minimizing the clearing footprint and replanting disturbed soil afterward helps prevent erosion on the slope you just changed. None of these choices require sacrificing durability. They just mean thinking about where materials come from before you order them, not after the truck shows up.
What Should You Budget for a Mortared Stone Wall?
Cost swings widely based on stone type, wall height, and whether you’re paying for labor or supplying your own sweat equity. Materials alone are the easier part to estimate; labor and site access are where budgets usually blow out.
Material costs depend heavily on stone choice. Granite runs at the higher end due to weight and cutting difficulty. Sandstone and limestone typically cost less and are easier to shape, which also cuts install time. Add cement, sand, lime, rebar, drainage gravel, perforated pipe, and filter fabric, and materials for a modest garden wall often land in the low thousands, climbing fast for taller retaining walls needing engineered footings.
Labor is the biggest budget variable. A skilled mason charges for both the physical build and the judgment involved in fitting irregular stone efficiently, which is exactly why poorly fitted DIY walls burn through so much extra mortar and time. Excavation adds its own line item, especially on sloped or tight-access blocks where machinery can’t easily maneuver.
Rough budgeting approach:
- Price stone and mortar materials first, since they’re the most predictable cost.
- Add 15 to 20% contingency for drainage components and footing concrete, which DIYers often underestimate.
- Get quotes for excavation separately if your site has slope, tight access, or unknown underground services.
- If comparing DIY against hiring, factor in tool rental (plate compactor, mixer, cutting tools) since those costs add up fast for a one-time project.
Smaller garden walls under a meter are the most realistic DIY budget target. Taller retaining walls, where engineering, reinforcement, and drainage complexity climb quickly, tend to favor professional quotes even for confident DIYers.
My Take: Should You Build It Yourself or Call a Pro?
DIY makes sense for garden walls under about a meter, with decent stone access and a weekend or two to spare; the skills are learnable and the tools are rentable. Taller retaining walls, sloped sites, or anything near a structure change the risk math fast. If you’re hiring out, ask about footing depth, drainage plan, and how they handle tie stones. Vague answers on any of those are a red flag.
— MYBMC
Skip the Trial and Error: Rokworx Handles the Hard Parts
There are practical alternatives to a full DIY build for homeowners who want a mortared stone or retaining wall done right the first time, without renting a plate compactor or second-guessing drainage specs. Every stage covered in this guide, excavation, footing, drainage, stone fitting, and curing, is typically handled by professionals across sloped and tight-access sites where equipment access and soil conditions change the whole plan.

If your project involves a slope, a boundary line, or a wall taller than a meter, that’s usually the point where professional excavation and installation save you both money and rework. Rokworx supplies the stone, handles the excavation, and builds the wall to hold up for decades, not just survive the first winter. Browse rock wall ideas for your project, or get in touch through the Rock Walls Melbourne page for a quote on your site.
Sources
- How to Build a Stone Wall with Cement (Step by Step) – Rock&Tools
- Technical note: Repointing stone and brick — Communities NI
- How to Build a Fieldstone Wall with Mortar: A Full Guide – The Hearthside Haven


5 Comments
bdbt777
Top notch gaming experience! The variety of slots is amazing and I love the daily bonuses they provide. Highly recommend checking out bdbt777.
shihtzulieblinge
Reinrassige Shih-Tzu-Welpen europaweit adoptieren🐶
schaeferhundblutlinien
Reinrassige Deutsche Schäferhundwelpen europaweit verfügbar 🐕🦺
ragsiamglanz
Ragdoll-, Siam- & Ragamese-Kätzchen europaweit🐱
papageienparadies
Europas Premium-Papageien aus Hausaufzucht 🦜