

You can build a stable retaining wall on clay soil, but only if you stop the water and size the footing and reinforcement for how clay actually moves. Small gravity walls under about 1.2 meters can be a solid DIY project when drainage and the base are done right. Anything taller, near a structure, or sitting in highly reactive clay needs an engineer before you pour or stack a single block.
TL;DR:
- Proper drainage, including a perforated pipe wrapped in fabric and crushed stone backfill, is essential to prevent water pressure buildup behind the wall.
- Foundations on clay require increased footing thickness, deeper embedment, and reinforcement measures like geogrids for walls over one meter tall.
- Walls taller than about 1.2 to 1.5 meters or near structures should involve an engineer due to high lateral forces and potential settlement risks.
- Moisture management via planting choices and surface runoff control helps stabilize clay soil and reduces swelling or shrinking impacts.
- Locally tailored site analysis, water table considerations, and professional installation are critical for long-lasting stability in Melbourne’s clay-heavy soils.
Table of Contents
- Retaining Wall Clay Soil Basics: Why Clay Behaves Differently
- Drainage and Backfill Specs That Stop Water Pressure Behind the Wall
- Footings and Reinforcement: Adjusting for Clay’s Extra Load
- When Clay Soil Means You Need an Engineer, Not a Weekend Project
- A Step-by-Step Checklist for a Small DIY Wall on Clay
- Rokworx’s Take on Building Retaining Walls in Melbourne Clay
- Choosing the Right Material for a Clay Soil Retaining Wall
- Beyond Gravel: Membranes and Waterproofing for Extra Protection
- Frost Heave and Clay: A Smaller Risk in Melbourne, Still Worth Knowing
- Planting Choices That Keep Moisture Around the Wall Stable
- Rokworx’s Editorial Take: Drainage Is a Design Decision, Not an Afterthought
- Get a Retaining Wall Built Right for Melbourne’s Clay
- Sources
Retaining Wall Clay Soil Basics: Why Clay Behaves Differently
Clay soil isn’t just “harder to dig.” It’s chemically and physically different from sand or loam in ways that matter enormously to a retaining wall. Expansive, or reactive, clay absorbs water and swells, then dries out and shrinks, cycling through the seasons. That swell-shrink motion pushes against anything in its path, including your wall.
Low permeability makes it worse. Water that would drain through sandy soil in hours can sit trapped against clay for days or weeks, building up hydrostatic pressure behind the wall face. That pressure adds to the normal soil pressure the wall already has to resist, and it’s the single biggest reason retaining walls fail on clay sites.
Swelling-induced lateral stresses in expansive clays depend on the moisture profile and surcharge load at the time, and they can’t be predicted with a simple formula. Detailed geotechnical or numerical analysis is often required for tieback walls built in high-plasticity clay.
That finding comes from an ASCE study on retaining structures in expansive clays, and it explains why two walls built the same way on different clay sites can perform completely differently. One might sit fine for a decade. The other bulges within a year because the moisture profile behind it never stabilized.
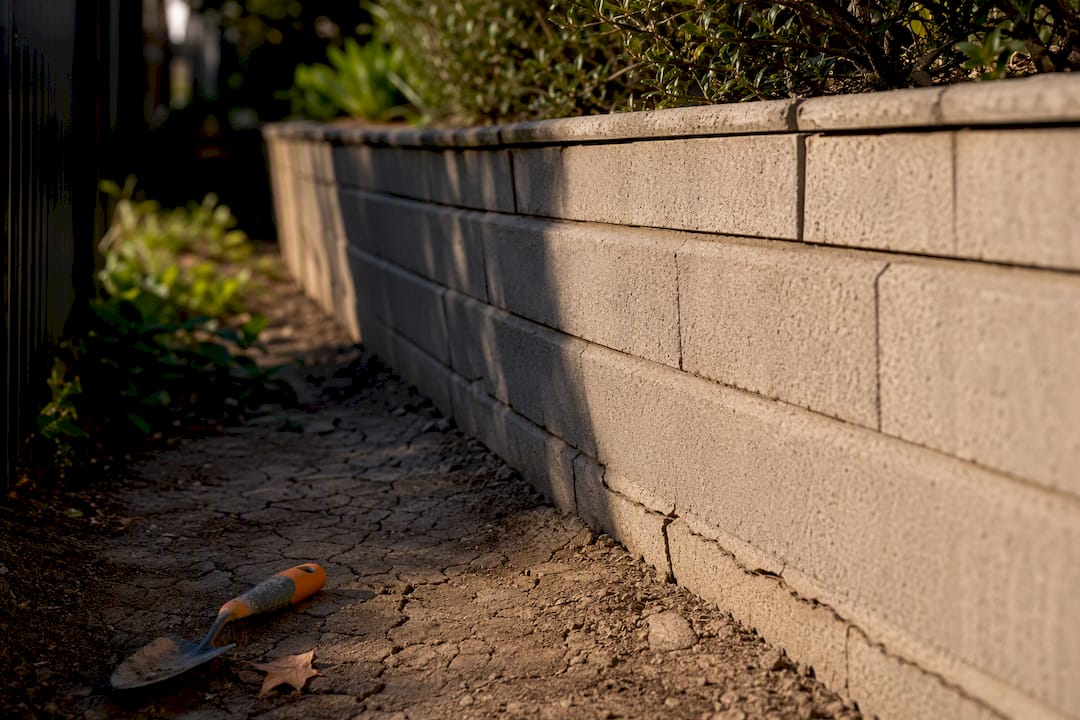
Consolidation settlement is the quieter failure mode. As clay dries and compresses under the wall’s weight, the footing can settle unevenly, tilting the wall forward even without a single drop of water buildup involved. Watch for a wall that leans outward at the top, bulges mid-height, or develops horizontal cracks near the base. Those are the three classic signs clay is winning the fight.
Drainage and Backfill Specs That Stop Water Pressure Behind the Wall
Clay soil retaining wall design starts and ends with drainage. Get this wrong and no amount of extra concrete in the footing will save the wall.
The rule that matters most: never backfill with the clay you dug out. Cohesive clay behind a wall traps water exactly where you don’t want it. Retaining wall guidance calls for 300 to 600 millimeters of clean, crushed free-draining stone placed directly behind the wall, with less than 5% fines content so it doesn’t clog with silt over time.
A practical drainage build follows this sequence:
- Excavate to the design line, leaving a working gap of at least 300 mm behind the wall face.
- Lay a perforated drain pipe, typically 100 mm (4 inches) in diameter, along the base of that gap.
- Wrap the pipe in non-woven filter fabric to keep fine particles from washing in and blocking the slots.
- Backfill with clean crushed stone in the specified zone, compacting in lifts rather than dumping it all at once.
- Slope the pipe to daylight or to a stormwater connection; where there’s no fall to daylight, route it to a sump pit with a pumped outlet.
- Wrap or cap the top of the gravel zone with fabric before finishing with topsoil, so surface silt can’t migrate down into the drainage layer.
Pro Tip: Check your drain outlet every spring after Melbourne’s wetter months. A trickle of clear water is normal. No flow at all after rain usually means the pipe or fabric has clogged, and that’s when hydrostatic pressure starts building unnoticed behind the wall.
Footings and Reinforcement: Adjusting for Clay’s Extra Load
Clay soil retaining wall stability comes down to the base as much as the wall face. A footing sized for sandy soil often isn’t enough once you’re dealing with swelling pressure and slower drainage.
Real project data backs this up. Contractors working engineered walls on clay sites have increased base thickness from 6 inches to 8 inches, with embedment depths pushed to 24 to 32 inches to handle a challenging toe slope or saturated ground. That’s not over-engineering. It’s a direct response to how clay pushes and settles differently than granular soil.
Key adjustments to consider for a retaining wall foundation on clay:
- Use a full concrete footing rather than a compacted crushed-stone base once wall height exceeds roughly 1 meter or the site carries any surcharge load (a driveway, patio, or structure above the wall).
- Compact the base in thin lifts, testing with a hand tamper or plate compactor between layers rather than one pass at the end.
- Add geogrid reinforcement once wall height approaches 1 meter, extending it back into the retained soil at a length roughly equal to 60 to 80% of the wall height.
- For higher walls or heavy surcharge, consider soil anchors or tieback systems, which distribute load further back from the face than gravity alone can manage.
- Increase embedment depth on sites with a visible toe slope or any history of ground movement nearby.
When Clay Soil Means You Need an Engineer, Not a Weekend Project
Some retaining wall jobs on clay are genuinely DIY territory. Others aren’t, and the line between them isn’t always obvious until you’ve already started digging.
Height is the first trigger. Once a wall crosses roughly 1.2 to 1.5 meters, engineering input stops being optional in most jurisdictions, and for good reason: the lateral forces at that height are large enough that a miscalculated footing can fail catastrophically rather than just crack cosmetically. Proximity to a driveway, house foundation, or boundary fence lowers that threshold further, since any settlement or lean risks damaging something expensive nearby.
Before you commit to a design, get the soil tested properly. At minimum:
- Dig a hand-auger hole or two along the wall line to observe soil layers and moisture at depth.
- Request an Atterberg limits test or plasticity index reading, which tells you exactly how reactive the clay is, not just that it’s “clay.”
- On larger or higher-risk sites, commission a shallow geotechnical bore to confirm bearing capacity and water table depth.
Certified design matters here because swelling stresses in expansive clay are site-specific and construction-sequence dependent. A local engineer who’s seen how a suburb’s clay behaves through a wet winter is worth more than any generic calculation.
A Step-by-Step Checklist for a Small DIY Wall on Clay
For a low gravity wall under about 1 meter, here’s the order that actually works on site.
- Call before you dig. Locate underground services and confirm there’s nothing running through your excavation line.
- Identify the soil. If it’s sticky, forms ribbons when rolled wet, and cracks visibly when dry, treat it as reactive clay and plan drainage accordingly.
- Excavate to competent subgrade, removing any soft or organic material until you hit firm, undisturbed ground.
- Lay and compact a gravel base, typically 100 to 150 mm, checking it’s level across the full wall length.
- Install the perforated drain pipe and slope it to an outlet before you place a single block.
- Build courses from the base up, checking level and back-slope (a slight lean into the hill) every second course.
- Place non-woven filter fabric against the excavated clay face before adding drainage gravel behind the wall.
- Backfill in the gravel zone, compacting in layers rather than flooding it all in at once.
- Finish with topsoil and confirm the drain outlet runs freely before you plant anything nearby.
Pro Tip: Build after a dry stretch if you can. Excavating clay when it’s saturated makes compaction far less reliable, and you’ll fight the soil the entire way down.
Keep checking the drain outlet seasonally, and watch the wall face each winter for any new lean, bulge, or crack. Clay soil drainage problems rarely announce themselves loudly. They show up as a slow lean over two or three wet seasons.
Rokworx’s Take on Building Retaining Walls in Melbourne Clay
Rokworx has spent years working Melbourne’s clay-heavy suburbs, where the same reactive soil that cracks driveways in January can trap water behind a wall by June. That local pattern is exactly why drainage-first design isn’t a nice-to-have here, it’s the baseline.
For readers weighing DIY against hiring out, Rokworx’s guides on excavating for retaining walls, drainage design, and sandstone retaining wall builds go deeper into the specifics covered here. If a site has tight access, a large boulder wall, or a slope that needs real earthmoving equipment, that’s usually the point where a professional crew saves you more in avoided rework than it costs upfront.
Choosing the Right Material for a Clay Soil Retaining Wall
Material choice matters less than drainage, but it still shapes cost, lifespan, and how forgiving the wall is if something goes slightly wrong.
- Interlocking segmental blocks are the standard DIY-friendly choice for walls under roughly one meter, fast to install and forgiving of minor grade errors, but they still fail if drainage behind them is skipped.
- Concrete sleepers handle taller walls well and pair naturally with a posted footing system, making them a good middle ground between DIY blocks and full engineered concrete.
- Gabions (rock-filled wire cages) drain almost by design, since water passes straight through the rock fill, which makes them genuinely well suited to wet clay sites.
- Natural stone and boulder walls offer excellent mass and a permanent look but need careful base preparation and are usually a job for a crew with the right equipment.
- Timber is the least suited option on clay long term; ground contact rot accelerates in the moist conditions clay creates, even with treated timber.
For a low garden wall, segmental blocks or timber-free alternatives make sense. For anything retaining a driveway or holding back a real slope, gabions or engineered concrete with proper embedment are the safer bet on clay. Expect to inspect drainage annually regardless of material, since clay-related lifespan and maintenance figures vary by product and installation quality far more than by brand.
Beyond Gravel: Membranes and Waterproofing for Extra Protection
Gravel backfill and a drain pipe handle most of the water load, but on sites with a high water table or heavy seasonal runoff, an added layer of protection helps close the gap.
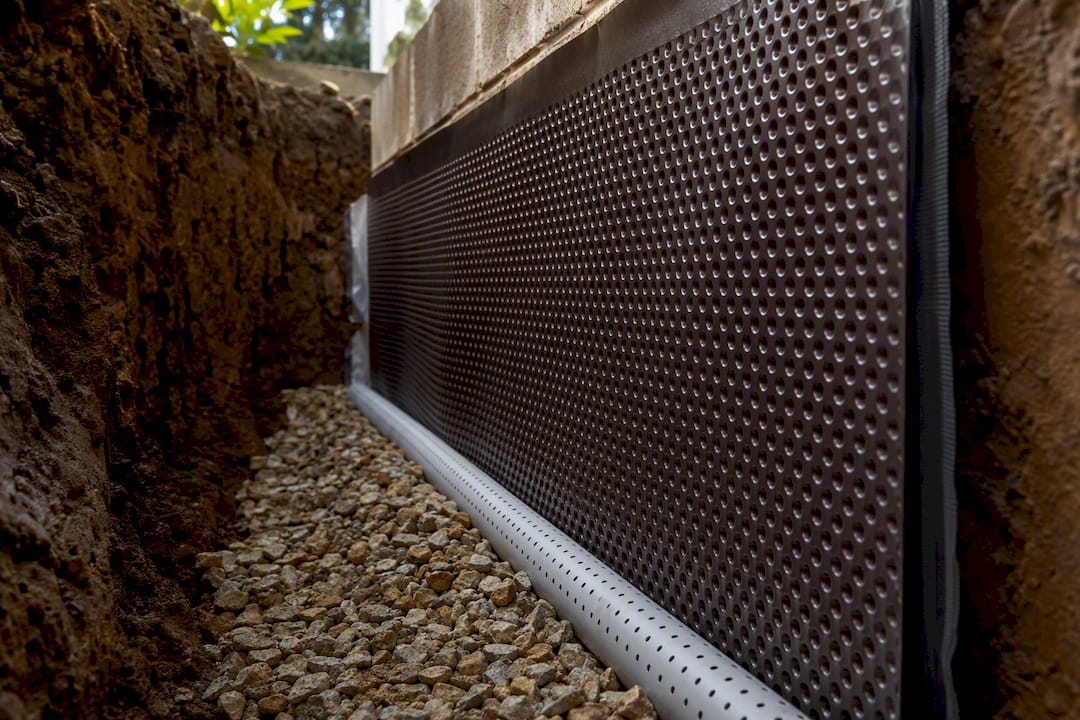
A waterproofing membrane, typically a dimpled polyethylene sheet or a bituminous coating, applied directly to the back face of the wall before backfilling stops water from wicking through porous materials like concrete block or poured concrete. It doesn’t replace drainage gravel. It works alongside it, keeping moisture from soaking directly into the wall material itself, which matters most for masonry and concrete rather than gabions or naturally permeable stone.
Surface water management matters just as much as what happens underground. A swale or graded surface slope directing runoff away from the top of the wall reduces how much water ever reaches the backfill zone in the first place. Combine that with a capping strip, a strip of low-permeability soil or paving at the top of the backfill zone, and you cut off one of the main paths water uses to enter the drainage system from above.
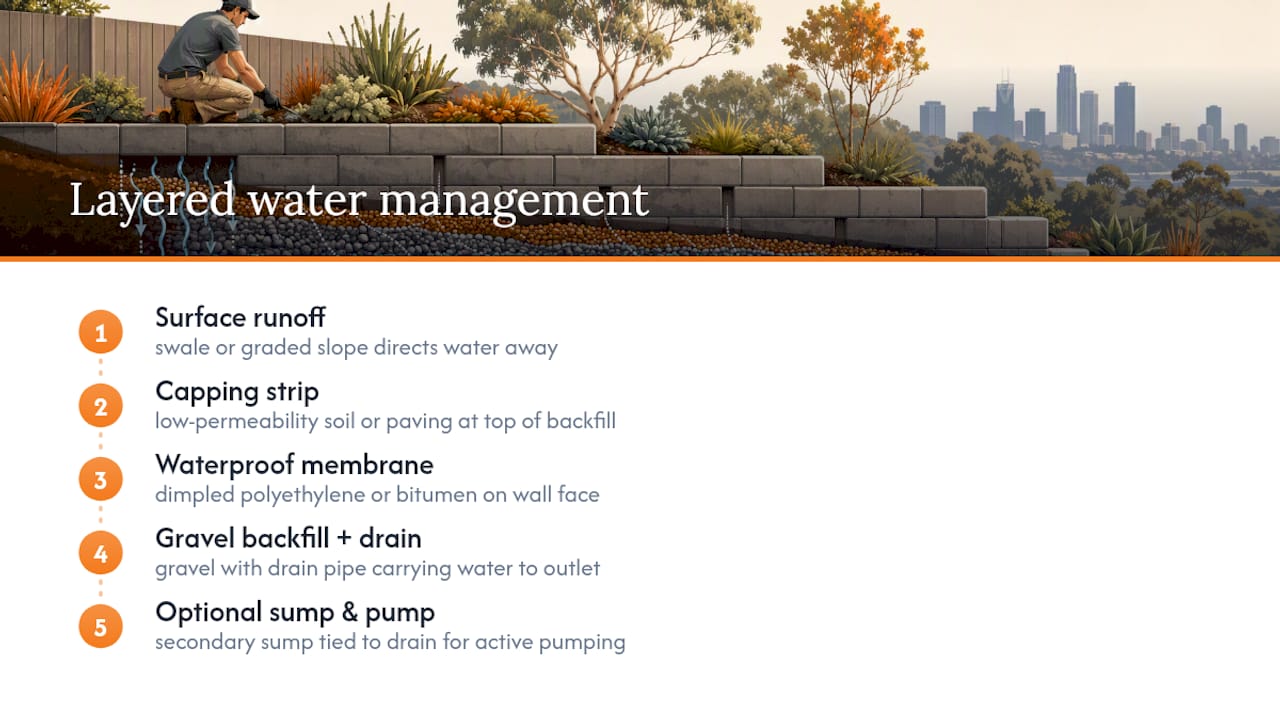
On sites with a genuinely high water table, some installers add a secondary sump and pump system tied into the drain pipe outlet, giving the wall an active pumping option rather than relying purely on gravity drainage to daylight. This adds cost and some ongoing maintenance, since sump pumps need periodic checking, but it’s the right call on a site where passive drainage alone can’t keep up with inflow during Melbourne’s wetter months.
None of these measures fix a wall with no gravel backfill or drainage pipe. They’re refinements for a wall that already has the fundamentals right, not substitutes for them.
Frost Heave and Clay: A Smaller Risk in Melbourne, Still Worth Knowing
Frost heave happens when water in the soil freezes, expands, and pushes upward or sideways against anything in its path, including a retaining wall’s footing. In clay, this effect compounds because clay already holds more water than sandy soil, giving frost more material to work with when temperatures drop low enough.
Melbourne’s winters rarely produce the deep, sustained ground freezing that causes serious frost heave damage in colder climates. It’s a far bigger issue in regions with hard freezes lasting weeks. Still, the mechanism matters for understanding why clay soil retaining wall design leans conservative on embedment depth everywhere, not just in cold climates.
The mitigation is the same one that already governs clay wall design: get the footing below the zone where moisture swings are strongest, and keep water from pooling against the base in the first place. A footing embedded 300 mm or deeper into stable subgrade, paired with the drainage gravel and pipe system already covered, addresses both hydrostatic pressure and any minor frost-related movement in one move. There’s no separate frost-specific fix needed for most Melbourne sites, since the drainage-first approach already covers the underlying cause: water sitting where it shouldn’t.
If you’re building at higher elevation or in a pocket known for harder frosts, treat embedment depth as non-negotiable rather than a nice-to-have, and lean toward the deeper end of the 24 to 32 inch range used on engineered clay projects.
Planting Choices That Keep Moisture Around the Wall Stable
Landscaping with clay soil around a retaining wall isn’t just an aesthetic decision. Plant roots and irrigation habits directly affect how much the clay behind your wall swells and shrinks through the year.
Thirsty, shallow-rooted plants right against the wall, lawns especially, create localized wet zones every time you water, feeding exactly the moisture swings that cause clay to expand unevenly. Large trees planted too close create the opposite problem: their roots draw moisture out of the clay during dry months, causing localized shrinkage that can undermine a footing over time. Both extremes are worth avoiding within roughly 2 to 3 meters of the wall face.
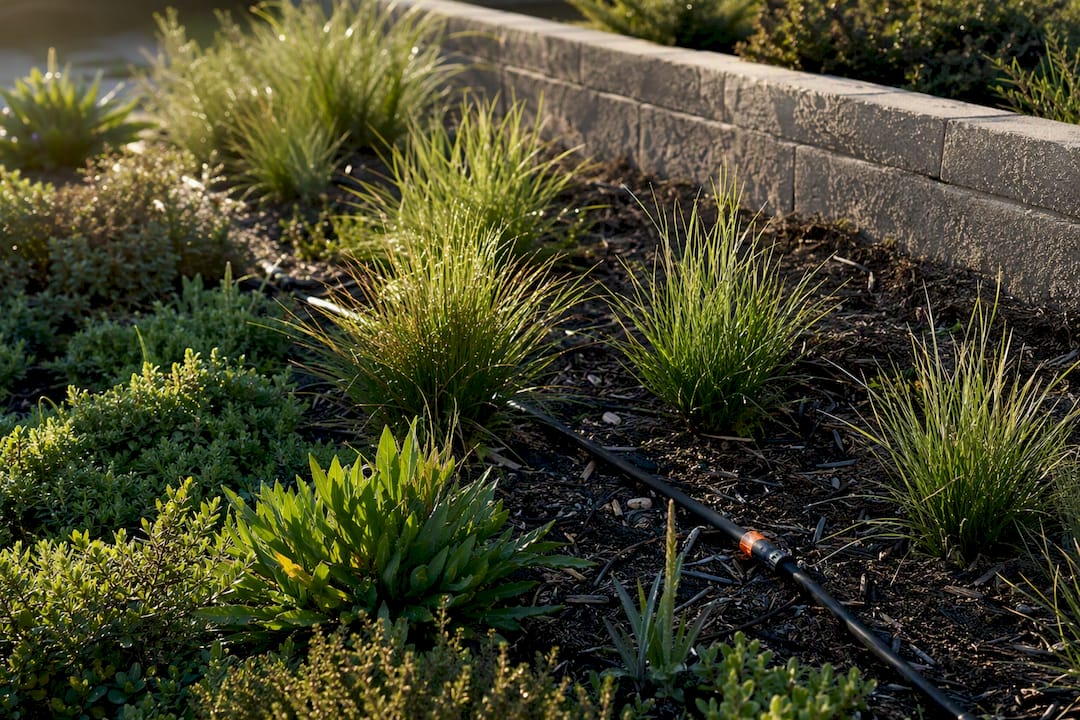
The better approach favors low-water, deep but non-aggressive rooted plants, ornamental grasses, many native groundcovers, and drought-tolerant perennials, set on drip irrigation rather than broad sprinkler coverage. Drip systems put water exactly where it’s needed instead of saturating the whole bed, which keeps moisture levels around the wall’s backfill zone far more consistent season to season.
If you’re planning garden beds or a small terrace behind a new wall, it’s worth thinking through the layout before you plant, not after. Onyx Removals has a useful rundown of small-space garden planning that pairs well with a clay-aware planting plan. Mulching the bed also helps, reducing evaporation swings that would otherwise pull moisture levels up and down every time the weather shifts.
Rokworx’s Editorial Take: Drainage Is a Design Decision, Not an Afterthought
Most retaining wall advice treats drainage as a checklist item, something you add after picking the material and wall height. That order is backwards for clay sites. The gravel, the pipe, and the fabric should shape every other decision, including how tall you can safely go without an engineer and which material actually makes sense.
The conventional wisdom oversells material choice and undersells the base. Homeowners spend hours comparing block colors and almost none deciding whether their footing needs to be 6 inches or 8. That’s the wrong ratio of attention. A plain concrete block wall with excellent drainage will outlast a beautiful stone wall with a clogged pipe.
If there’s one prioritization worth taking from this: test your soil before you buy materials, not after. Knowing whether you’re dealing with mildly reactive or highly expansive clay changes the footing, the embedment depth, and whether this is a weekend project or a job for tight access excavation equipment and a professional crew.
— MYBMC
Get a Retaining Wall Built Right for Melbourne’s Clay
Some companies supply and install rock retaining walls with drainage designed for the clay conditions common through certain regions, rather than a generic template pulled from sandy-soil markets. That’s the practical difference between a DIY attempt that needs redoing in three years and a wall built once, correctly, with the base and drainage sized for how local clay actually behaves.

If your project involves a slope over 1.2 meters, tight side access, or a large boulder wall that needs real earthmoving equipment, that’s exactly where Rokworx’s rock wall installation service earns its keep over a solo weekend build. Professional rock wall installation services can handle everything from excavation and drainage through to final rock placement, ensuring footing, embedment, and drain systems are matched to your site’s soil rather than a one-size-fits-all guide. Browse the rock wall gallery for examples of finished projects across Melbourne, or get in touch for a quote on your site.
Sources
- Retaining Walls: Design, Types, Materials, Formulas & Installation
- Retaining structures in expansive clays / tieback walls study
- Building an engineered wall on clay soil


5 Comments
bigwin29
The detailed focus on drainage and reinforcement highlights that structural integrity, whether in clay soil or digital platforms, relies entirely on meticulous foundational planning. It’s a universal lesson in risk management. Just as proper engineering prevents collapse, ensuring a bigwin29 legit platform maintains security and stability is paramount for a seamless user experience. bigwin29 legit
taktikwacht
Kaufen Sie diskret die besten Handfeuerwaffen in Europa
champion-bulldoggen
Champion-Europäische Bulldoggenwelpen zur Adoption
ketamight
https://ketamight.com – Order Ketamine
puremoleculelabs
https://puremoleculelabs.com Molecular Labs